Adding Camera Movement to Video Footage in Blender 3D
For our latest short film I wanted to add very subtle camera movements to simulate a kind of hand-held feel to the action.
There are three ways I could go about this:
The first would be to animate the camera jittering about while doing the animation.
This would lead to longer rendering times of the backgrounds especially in scenes requiring lots of ray tracing and mirrored reflections.
The second way would be to render the scenes with a static camera and then import these sequences into Blender Sequence editor and apply the ‘Jitter’ plugin.
This would render faster but the jitter not very convincing.
The final way would be to render the scenes with a static camera and then import them back into Blender, project the images onto a 3D card which we can then add (limited) camera movement on the X and Y axis, as well as zoom.
SO this is the technique that I’m gonna use.
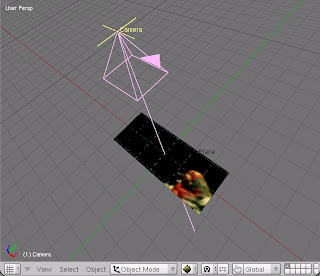
Ok, what’s the purpose/benefits of doing this?
Well, firstly, this method involves putting an image onto a plane (or any shape – but mostly a flat plane) and then using a 3D camera to perform simple pans, rotations and zooms on this image.
By doing this you can achieve some simple camera effects like handheld jitter.
Its not 100% accurate but it will suit some scenario’s and it is a great little way to do some useful cropping and post-processing on pre-recorded/animated footage.
It’s really easy to set up a 3D viewing plane:
All you need is a Camera and a Mesh Plane.
When inserting the Camera and the Plane, press ALT+R and then ALT+G to clear their rotation and location co-ordinates.
Then drag the Camera back on the Z-axis far enough so that you can see the Plane in the Camera View. Press CTRL+A to clear rotation/location/scale.
Now press the ‘0’ key on your keyboard to enter 3D view from the camera’s perspective.
Now, I’m working in this instance with footage that has dimensions of 720 X 300 pixels.
(For the actual film I will be using dimensions of 900 X 432 pixels but lets just use 720 X 300 for this example)
In the Render Buttons panel enter 720 X 300.

Now scale your mesh plane in Edit Mode so that it fits perfectly inside the camera view.
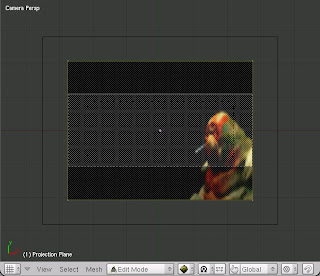 Fig 1: The image before being scaled to fit the camera view.
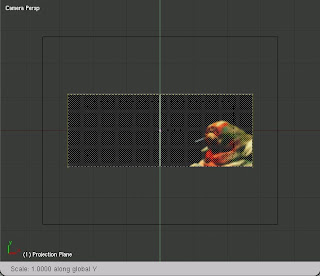 Fig 2: The image scaled to fit inside the Camera view accurately.
Enter UV edit mode and select all the vertices and Unwrap using “Project form View Bounds”. (It helps if you select a single still image from your image sequence and import it separately into the UV window so that it allows you to visually line up your plane to the correct scale)
Go to the Material buttons tab and add a new material to the plane.
Go to the Texture buttons and add a new texture to the plane – select an image sequence or movie. Enter the amount of frames you want to use in the box to shows up.
Go back to Material buttons and select Shadeless (and TEX FACE if you want).
In ‘MAP INPUT’ choose ‘UV’.
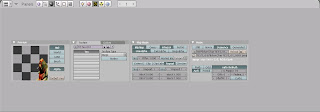
See the enclosed image for settings (you may note that I was using an image sequence with an Alpha channel).

Go to the render buttons panel and enter the output frame size you wanna use.
In this instance it’s 720 X 576 (PAL).
You will notice that the top and bottom of the 3D viewport fame has increased.
This is because the frame size I choose before (720 X 300) was intended to give a ‘letterboxed’ image.
Make sure Ambient Occlusion is turned off when rendering or else you will end up with the sky showing through in the background and increased render times.
Now that you are all set up, you can move the Camera about in 3D space and animate it using IPO’s.
You can zoom in on selected areas, or do pans and rotations.
Remember that when doing pans and rotations you need to be zoomed in slightly (or a lot!) or else you will end up with a strange looking cropped image.
This is why I rendered my initial sequences of the film as larger than my intended output size – 900 X 432 instead of 720 X 576.
This means that I can zoom in for camera movements without the image getting blocky or pixellated.
Add ‘jitter’ camera movements that zoom in and out and pan from side to side and up/down using IPO curves.
Be careful not to over do it or to add too much movement as it will become disorientating – and look a bit crap! Subtle moves will help add to the general feel of your movie.
Experiment with this technique and see what else you can come up with!
Shane Dwarfed Films


