Search This Blog

Tuesday, December 15, 2009

Festival More news on "A Polish winter"


More news on "A Polish Winter" screenings at upcoming festivals:


It is showing at The Greater Phoenix jewish Film Festival, In Arizona, USA.


It is also showing in competition at the Derby City Film Festival, USA


You can download and watch "A Polish Winter" at this link

The file is in XVid Mpeg4 format and it's size is approximately 165MB.


"A Polish Winter " is a moving tribute to the Holocaust through the eyes of a child.

Monday, October 26, 2009

"A Polish Winter" Nominated for Blender Suzanne Award

Our Holocaust-themed short film "A Polish Winter" is nominated in the category of Best Film at this years Blender Suzanne Awards.

The Suzanne awards are the Blender Foundation's version of the Oscars, so we are very happy to be nominated.


Blender 3D is the software we used to create A Polish Winter.

Thursday, October 08, 2009

A Polish Winter - Screenings Update


"A Polish Winter" is playing at the Bangkok International Film Festival shortly and also screened at the Portobello Film Festival London a few weeks ago.

Thursday, June 25, 2009

Sci-Fi Short - Location Design images


Here are some images of the location that the Sci-Fi 3D animated short is set in.

You can see that it's a grimy, dark spaceport room with a bizarre television set as the focal point!

All models were created using Blender 3D and all textures were made using The Gimp.

Click on the images to view full-sized.

More images to follow soon....

Tuesday, June 16, 2009

Link - Ohio Blender User

Here is a link to a filmmaker and special FX guy from Cleveland, Ohio who's been using Blender.

http://clevelandfx.blogspot.com/

I'm always interested in hearing from other Blender 3D users around the World and finding out what techniques and work they're doing with Blender.

So, if you have some tricks up your sleeve or are doing some interesting stuff with Bleneder feel fre to get in touch and i'll try and put up a link to your website/blog.


Shane
Dwarfed Films

Adding Camera Movement to Video Footage in Blender 3D

Adding Camera Movement to Video Footage in Blender 3D


For our latest short film I wanted to add very subtle camera movements to simulate a kind of hand-held feel to the action.
There are three ways I could go about this:

The first would be to animate the camera jittering about while doing the animation.
This would lead to longer rendering times of the backgrounds especially in scenes requiring lots of ray tracing and mirrored reflections.

The second way would be to render the scenes with a static camera and then import these sequences into Blender Sequence editor and apply the ‘Jitter’ plugin.
This would render faster but the jitter not very convincing.

The final way would be to render the scenes with a static camera and then import them back into Blender, project the images onto a 3D card which we can then add (limited) camera movement on the X and Y axis, as well as zoom.


SO this is the technique that I’m gonna use.


Ok, what’s the purpose/benefits of doing this?

Well, firstly, this method involves putting an image onto a plane (or any shape – but mostly a flat plane) and then using a 3D camera to perform simple pans, rotations and zooms on this image.
By doing this you can achieve some simple camera effects like handheld jitter.
Its not 100% accurate but it will suit some scenario’s and it is a great little way to do some useful cropping and post-processing on pre-recorded/animated footage.


It’s really easy to set up a 3D viewing plane:

All you need is a Camera and a Mesh Plane.
When inserting the Camera and the Plane, press ALT+R and then ALT+G to clear their rotation and location co-ordinates.

Then drag the Camera back on the Z-axis far enough so that you can see the Plane in the Camera View. Press CTRL+A to clear rotation/location/scale.

Now press the ‘0’ key on your keyboard to enter 3D view from the camera’s perspective.

Now, I’m working in this instance with footage that has dimensions of 720 X 300 pixels.
(For the actual film I will be using dimensions of 900 X 432 pixels but lets just use 720 X 300 for this example)

In the Render Buttons panel enter 720 X 300.


Now scale your mesh plane in Edit Mode so that it fits perfectly inside the camera view.


Fig 1: The image before being scaled to fit the camera view.


Fig 2: The image scaled to fit inside the Camera view accurately.


Enter UV edit mode and select all the vertices and Unwrap using “Project form View Bounds”. (It helps if you select a single still image from your image sequence and import it separately into the UV window so that it allows you to visually line up your plane to the correct scale)

Go to the Material buttons tab and add a new material to the plane.
Go to the Texture buttons and add a new texture to the plane – select an image sequence or movie. Enter the amount of frames you want to use in the box to shows up.


Go back to Material buttons and select Shadeless (and TEX FACE if you want).
In ‘MAP INPUT’ choose ‘UV’.

See the enclosed image for settings (you may note that I was using an image sequence with an Alpha channel).


Go to the render buttons panel and enter the output frame size you wanna use.
In this instance it’s 720 X 576 (PAL).
You will notice that the top and bottom of the 3D viewport fame has increased.
This is because the frame size I choose before (720 X 300) was intended to give a ‘letterboxed’ image.

Make sure Ambient Occlusion is turned off when rendering or else you will end up with the sky showing through in the background and increased render times.

Now that you are all set up, you can move the Camera about in 3D space and animate it using IPO’s.
You can zoom in on selected areas, or do pans and rotations.
Remember that when doing pans and rotations you need to be zoomed in slightly (or a lot!) or else you will end up with a strange looking cropped image.
This is why I rendered my initial sequences of the film as larger than my intended output size – 900 X 432 instead of 720 X 576.
This means that I can zoom in for camera movements without the image getting blocky or pixellated.
Add ‘jitter’ camera movements that zoom in and out and pan from side to side and up/down using IPO curves.
Be careful not to over do it or to add too much movement as it will become disorientating – and look a bit crap! Subtle moves will help add to the general feel of your movie.


Experiment with this technique and see what else you can come up with!


Shane Dwarfed Films

Wednesday, June 10, 2009

New Image from lender 3D animated Sci-Fi short


Here's another image showing the television from our latest short film.

Keep watching this site for further updates, images and news!

Monday, June 01, 2009

HP Printer will not install on Windows Vista? - Heres what to do


Having a problem trying to install a Hewlett Packard printer onto your Windows Vista PC/Laptop?

Does your install stall after failing to locate the drivers?

Well, I sympathize with you becasue the other night I nearly went crazy trying to get a damn printer to install on a Vista machine!

The computer would not recognize the new printer despite many, many attempts.
I tried re-installing the software multiple times to no avail.

I searched the Internet for solutions and went to the HP website for help.
I emailed HP for assistance - no reply yet.
I went to the HP website and downloaded the driver software again - even though I had the brand new install CD!

Well, it doesn't matter anymore because I found the solution myself!

Here was the problem (in case anyone else out there encounters similar):
After installing the software and drivers on the enclosed CD, the set-up screen then asked me
to connect the device to the machine using the USB cable. Then I was asked to search for the driver - the first option was to search the install CD for these drivers.
After a few moments the screen then said that the drivers could not be found.

Crap!

THE SOLUTION:

The solution was actually very easy!
I unplugged the USB cable and then replugged it again, prompting the set-up screen to ask me to locate the drivers for the printer.
Instead of selecting 'Search install CD', I choose to manually search for the drivers and redirected the computer to search the path: "c:\windows32\" or just "c:\windows\" - in other words, telling the computer to search your local hard drive for the files.

After a few moments the drivers were located and the machine installed correctly!
If you come across this problem, I hope this helps you out.


Now, how the hell did HP allow such a simple but annoying issue to crop up?
Surely they should've sorted a basic error like this before launhcing equipment and software.


I wish software/hardware manufacturers would get their act together and not release software until it has been properly screened, tested and checked.

Irritating nonsense like these install issues are the sort of thing that puts consumers off using certain manufacturers products in the future....

Thursday, May 21, 2009

Blender Sci-Fi Short - Vicious Bug Character


Here is the re-designed bug character from our latest short 3D animated film.

Click on the image to view larger.

The previous model I created for the film just didn't feel right so I did a complete overhaul and redesigned this one yesterday then completed the texturing and rigging late last night.

It's a nasty-looking winged bug that I feel fits perfectly with the style of the film much more than what we originally had.

The lead character - which you can see in a previous post - is a slob-like, chain smoking, fat, lazy, bum!
The razor-fanged leech-shaped fly fits the whole stylistic design we want the film to have.


I mentioned in an earlier post about the lighting and how important it is to the look and feel of this short.
The atmosphere really depends on having the correct lighting setups for the particular scene tone.
Get it wrong and you run the risk of messing up movie, so I'm spending a lot of time working out the correct lighting setups and how they will work with shot angles and how they basically make the character models look.
Bad lighting can destroy a good model!

Keep tuned for more updates on this film which is being made using Blender 3D and other open source/freeware software.

Monday, May 18, 2009

A Polish Winter showing in Geauga Ohio film festival


Hi there!


Our short 3D animated film "A Polish Winter" is screening at the inaugural
Geauga Film Festival .


Heres the press release from the festival:


"

....Geaugafilm.org, in cooperation with the Geauga Lyric Theater Guild, has selected the films for their inaugaual film festival June 9-14.

“We had over 70 films entered from all over the world” stated Greg Pribulsky, vice president of the Guild and committee chair for the festival. “It is great to see so many talent filmmakers wanting to show their work in our historic theater.”

A total of 44 films (both short and feature length) will be shown over the 6 day event starting on June 9-14. Films from as far away as Meath, Ireland, Los Angeles, California and Palm Bay, Florida were entered in this first film festival for the Geauga Lyric Theater organization.

“We had films from all over the US, Canada and even Ireland entered.” said Pribulsky. “I really am amazed at the quality of the work..."


We are delighted to have the film screen at this film festival which takes place in Ohio, USA.

A Polish Winter was written/directed/produced/animated/music composed by Shane Sheils and Paula Sheils.
It tells the story of a young boy who discovers an abandoned train cattle carriage in Eastern Europe. Upon entering inside and finding a discarded doll, memories are triggered of the Holocaust and the murder of countless children in Nazi death camps in occupied Poland.

The film was made using mostly Open Source software such as The Gimp, Blender 3d and Audacity.

For further information, you can view the making of this film on these websites:


Sunday, May 17, 2009

New Sci-Fi Short Being Made with Blender 3D -UPDATE


Well, here's a cropped test image from some of the experiments being tested out during the making of out as yet unnamed Sci-Fi 3D animated short film.


We are very pleased with the script and the production is moving along nicely.
Certain elements such as atmospheric effects and lighting and texturing are what are taking up most of our time working through.

We are using 3K textures for the characters that have been exported from UV maps in Blender to The Gimp where they have been meticulously altered and improved, then re-imported back into Blender and altered some more!
Then the process begins again until we get the look we're after.

The room in which the story takes place is not yet finalized and a few other elements in terms of 3D design.
The lead characters were designed and rigged pretty easily -it's the texturing and lighting part that requires lots of focus and attention.

So far we're not going to divulge any plot details apart from saying that the film is certainly gonna be one of the strangest and most bonkers things we've ever made!


Keep watching for more updates and making of details.

Saturday, May 09, 2009

New Sci Fi Short Film being produced by Dwarfed Films

Hi there,

It's been a little while since we last posted here so lets get up to date with whats going on!

We've a new Sci-Fi short in the works.


Here's a composite still with 3 images pasted together showing the lead character - an alien creature who chain smokes!


We're not gonna reveal any plot details at the moment but are simply gonna share the following:
  • The film is another 3D computer animation
  • It's being produced using Blender 3D
  • Both of us are directing -as per usual
  • We've been working on a fantastic soundtrack and sonics
  • It's a Science fiction film!! - we've waited a long time before getting around to making one
More pics, plot details and making-of's soon.

Keep visiting for more info.

Tuesday, March 03, 2009

A Polish Winter -Completed


A Polish Winter has been completed.

The film is set in Eastern Europe just after the end of World War II and is a moving tribute to the children murdered in Nazi death camps during the Holocaust.

The 3d animated short film was written and directed by Shane Sheils and Paula Sheils.
The soundtrack was also composed by Shane and Paula.


The entire movie was created using Blender 3D, the Gimp and some other open source or freeware software programs.

We will try and upload the A Polish Winter Press Pack soon.


Mr. Humpfninkel's Sales Technique Playing at Belafast Film Festival 2009

Mr. Humpfninkel's Sales Technique is in the Jameson Short Film Competition at this years Belfast International Film Festival in Belfast, Northern Ireland.


Visit Belfast Film Festival Website


The festival takes place in March.

Mr. Humpfninkel was written and directed by Shane Sheils and Paula Sheils of Dwarfed Films. The part of Mr. Humpfninkel was played by American Sherman Alpert.

Friday, January 23, 2009

A Polish Winter - January Update


A Polish Winter – January Update

Here are some new images from the Holocaust-themed short animated film “A Polish Winter”.

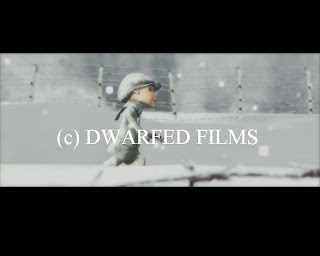
The first shows the lead character – a young boy - walking through a snowy landscape.

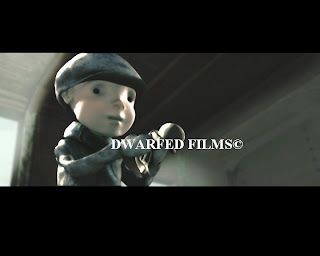
The second image is a composited image that shows a previously seen image of the boy – except this time with background, lighting effects and colour grading applied

Colour Grading and Compositing

The most time consuming aspect of this film is (once again) the rendering of separate layers and passes which must then be composited together in order to achieve the final image ‘look’.

I personally love the ability of being able to alter and grade each shot in this way but it does tend to get very monotonous filing away every single frame of animation in particular folders rather than having to deal only with only a few thousand fames instead!

‘Grading’ is what gives a film’s images a particular ‘look’.

That could involve a desaturation of the films colours to give a more grey-tinged hue or could involve dong the opposite and increasing the saturation of particular colours in the movie to give it a more extreme look.

I prefer the look of strong light and dark tonal qualities, which emphasises the highlights and shadows of an image. It helps create a visual unity of each still image while at the same time making the character blend better with his surroundings.

I also don’t like the ‘plastic’ look of 3D animation and try as hard as possible to avoid this. I hate surfaces looking too shiny and perfect.

Another ting is depth of field: unlike reality, in the computer world it has to be faked. Also, in the natural World, colours need to integrate as a unit, rather than stand out on their own (unless it’s a deliberate effect). I find that reducing saturation levels, and compensating for a washed out type image by upping the contrast, really helps blend a shot better and make it seem less ‘computery’ looking. It’s not about making photo-realism – and the cartoonish-styled “A Polish Winter” is never gonna have to worry about that – but an attempt to make an obviously false World seem more ‘real’ and tangible.

It’s amazing how much time is spent trying to create an ‘imperfect’ image!

It’s amazing how much you can alter a films look in the colour grading stages: a sequence that seems pretty uninteresting can be immediately given new life and excitement by simply altering the colour levels and contrast settings.

Grading is mostly used to ensure a flow of sequences blend seamlessly.

Lighting animation is similar to real world lighting in that what looks ‘right’ from one camera perspective, may not look so good (or indeed, look terrible!) from another viewpoint.

On “A Polish Winter” I would set up the lights for each particular camera view and then have to alter each one in order to ensure nothing ‘weird’ happened: for instance, the character being light with a bright light from the left hand side suddenly is lit from the right side in the following shot.

Sometimes this is done on purpose when I want to create a highlight along one side of the character’s face when in partial silhouette, so as to separate him from the background (they do this all the time in Hollywood movies and TV shows like CSI). But when I’d cut to the opposite viewpoint I’d switch the highlight to the characters other side. This wouldn’t happen in real life but it’s an age-old filmic convention going back to the early days of cinema. It just looks good!

But with animation you can’t predict what way the entire animation sequence will look until it’s been rendered, so occasionally you might find that the highlight you set up for that character doesn’t work so well because the figure moves at angles that obscure the effect.

It’s moments like these that you sometimes need to get a bit creative in the grading department!

Altering contrast on particular colours can create artificial highlights. You can also create a glowing white-coloured mask of the character that you composite with the original footage in order to separate the figure from the background.

Making Snow

Because the film takes place in a snowy setting, our software of choice Blender 3D must calculate large amounts of particle data.

In one 500-frame sequence the storage space needed just for the baking of particle data reached over 2 gigabytes!

Side Note:

Just this morning I received another external portable storage device, which is mainly to cope with archiving all the files needed to make an animated movie.

Unfortunately the Western Digital device I got didn’t see to want to work on Windows Vista so I spent a bit of time looking up solutions on the Internet and trying to locate device drivers.

Eventually I got Vista to recognise it but then I noticed that this 320 Gig portable drive was formatted to the older-style FAT32 filing system which limits the amount of individual file sizes!

It took about 5 hours (yes, 5 hours!) for Vista to reformat the drive into NTFS format.

A previous Western Digital portable drive we were using worked immediately out-of-the-box so I can’t understand the issues with this newer disc.

Using Baked UV Maps to Cheat!

I’ve tried to cut back on long render times by baking textures quite a lot.

For instance, the snowy ground plane has had its textures and shadows baked into a UV map. This allows me to apply a shadeless UV mapped material to the ground that doesn’t need to use of valuable rendering time as the textures and all-important shadows are already there.

The main exterior scene area of the film is surrounded by barbed wire fencing that was originally modelled and designed as 3 dimensional meshes.

This seriously ate up CPU, so instead I created a UV mesh of barbed wire and fences, then baked shadows and lighting onto these UV’s. Then I applied these pre-rendered UV maps to simplified meshes and planes in the scene to replace the original complex models.

The result? Faster rendering and the ability to visualise camera moves in the 3D view port more efficiently.

‘Cheats’ and ‘tricks’ like rendering baking often take up a lot of time to set up in the first instance but pay off in the end.

Mixing a combination of baked texture planes in the background with fully modelled 3D objects in the foreground works very well.

Remember that the final image will be viewed as 2D, regardless of the fact that it was once a 3D object!

Baking textures and shadows onto meshes also helps prevent horrible flickering during playback of animated frames and can also allow you to create more complex and detailed multi-layered textures (you can edit the baked textures in The Gimp/Photoshop as much as you want and then drop it back into your scene to see how it looks).

Music Composing

We’ve also scored the main theme music from the film.

Mostly performed on harsh violin and cello, the sound is then distorted with heavy reverb. Other VST effects are added to the mix to boost the low end and liven up the mid-tones.

It’s haunting and really adds to the poignancy of the themes of the film.

More images and details about “A Polish Winter” will be added to the site soon.